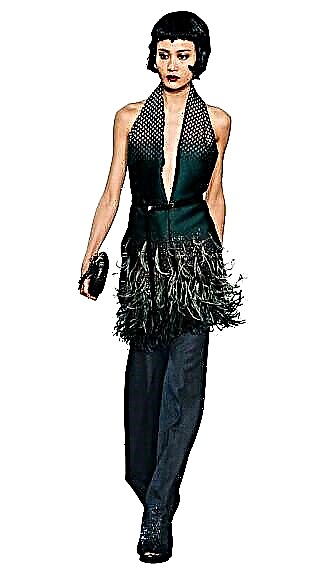
It is easy and simple to carry out bright decor on the bottom of the dress, along the edge of the peplum, to emphasize the waist line or to decorate the sleeves with the help of feather ribbon.

You can come up with many options for processing the bottom of the product using feather tape. In today's master class, we will show an option made by the type of a fastener clasp. This method is suitable for processing transparent and translucent, as well as swing products, where the presentable appearance of the wrong side is important. It’s also a great way to renew a boring thing or lengthen a thing that is too short. Feathers can be removed to wash the product, change to a different type of decor or fasten the feather ribbon to another thing.
Fastener clasp in a product with a hem
You will need:
product in which it remains to process the bottom (allowance for processing the bottom - 1 cm)
Besides:

- a flap of medium density fabric, for example, cotton;
- feather tape;
- an awl or a manual punch and a hammer;
- buttons and device for their installation with an appropriate set of nozzles;
- disappearing marker for fabric or chalk;
- threads, tailor pins, scissors, ruler.
Step 1

Measure the length of the bottom of the product.
Step 2

Cut a strip of cotton fabric for a hidden strip.
The length is equal to the length of the bottom of the product + 2 cm for allowances, in my case: the length of the bottom of the product is 49 * 2 + 2 = 100 cm.
Width: 1 cm for allowance, 3 cm - bottom hem, 2.5 cm + 2.5 cm countersunk, 1 cm - allowance = 10 cm.
Step 3

Sweep lines 2 and 3 from the top so that they are visible from the front.
Step 4

Iron the part on the wrong side along the bottom marked line (line 4 in the photo).
Step 5

Unfold the part again. Fold the part in the ring by connecting the short sections. Start short sections, leaving an allowance of 1 cm. Iron.
Step 6

Connect the detail of the hem with a one-piece countersunk strap to the bottom of the skirt, folding their front side to the front side. Chop and grind, leaving an allowance of 1 cm.
Step 7

Unscrew the grind for allowance. Iron.
Step 8

Grind on the seam allowance at a distance of 1-2 mm from the seam, stitch length ~ 3 mm.
Step 9

Unscrew the hem on the wrong side of the skirt, forming a transitional edging. Iron. Fix the trim with pins or sweep.
Step 10

Lay a line with a stitch width of ~ 3 mm along the sketched line (line 2 in the diagram). The bottom allowance of the part falls into the seam from the inside.
Step 11

Delete the note. Unscrew the countersunk plate down and iron.
Step 12

Using a washable marker or chalk, mark the installation points of the buttons at a distance of 8-10 cm from each other.

Install the buttons on the countersunk so that the “hat” of the button is on the wrong side of the skirt, and the working part of the button is located inside the strap (between the bottom hem of the skirt and the countersunk).
Step 13

On the feather tape, mark the installation locations of the buttons at a distance of 8-10 cm, according to the installation distances of the buttons on the countersunk skirt.
For marking, punch small holes with a hand punch and a hammer or pierce with an awl.
Step 14

On the pen ribbon, set the buttons according to the punched holes.


Tip:
Feather tape can be placed in one layer or in two layers. In this case, it is necessary to measure 2 lengths of the tape and install the buttons through both layers, folding the tape into 2 rings. Buttons corresponding to the end and beginning of the feather-ribbon rings are located side by side.

Now you can fasten the feathers to the product. The view from the front side.

So the clasp looks from the inside.


And so the inside of the skirt looks like: a satin ribbon folded in half is hidden under a hidden bar.
The presented method can be used to process the bottom of a skirt or dress, sleeves, vertical lines of patch panels of wrap skirts, belts and basques.
How to decorate a regular pullover with feathers
And here is how you can beat with the help of this current decor of the Burda model:
Process the bottom of the dress of a straight cut

- Special offer

- 1
- 2
- 3
- 4
Add charm to a wrap skirt

- Special offer

- 1
- 2
- 3
- 4
Decorate the bottom of a sweater or jacket

- Special offer

- 1
- 2
- 3
- 4

- Special offer

- 1
- 2
- 3
- 4
Make sleeves fancy

- Special offer

- 1
- 2
- 3
- 4

- Special offer

- 1
- 2
- 3
- 4
Create an evening outfit with peplum feathers

- Special offer

- 1
- 2
- 3
- 4
Focus on the waist

- Special offer

- 1
- 2
- 3
- 4

- Best-seller
- Special offer

- 1
- 2
- 3
- 4
DIY feather accessories
The author of the master class and photo: Daria Tabatchikova

By education, Daria is a PR specialist and economist, but several years ago she devoted herself entirely to her favorite business - sewing.
She learned to sew from magazines, books and using the Internet, there are also sewing courses in the arsenal, but Daria considers herself to be self-taught. She loves to study specialized sewing literature from different years and countries, and then put her knowledge into practice.
At the end of 2017, Daria became the winner of the festive contest from BurdaStyle.ru.
She leads her Instagram page and VKontakte group.
Material prepared by Julia Dekanova


