Fabric bags can be either a convenient replacement for a shopping bag or an independent accessory. In our review - a master class on the manufacture of such a bag and options for decorating it.
1. Sew a cloth bag in an hour: video workshop
You will need:
Fabric: thick linen or cotton, denim, thick calico - about half a meter
Glue-on interlining 1 m by 8 cm
Thread
Scissors
Iron
Sewing machine
When the bag is ready, you can decorate it according to your desire and imagination. However, you can paint the fabric for the bag before sewing - sometimes it is even more convenient.
Master class: summer bag from a scarf
2. Bag with a "vegetable" print: a master class
In needlework or art stores, you can buy a variety of factory stamps - but much more fun to do them yourself. Great material for this is fresh vegetables. Many of them can be used for stamping without any processing: for example, an ear of corn gives a beautiful pattern. From dense root crops (potatoes, carrots), stamps of different shapes and options can be carefully cut.
Photo: inhabitat.com
You will need:
Acrylic paints for fabric of different colors
Paint mixing tanks
A pair of flat substrates made of waterproof material (glass, plexiglass)
A variety of vegetables (carrots, bell peppers, celery, corn)
Brushes
Iron
1. Cooking vegetables
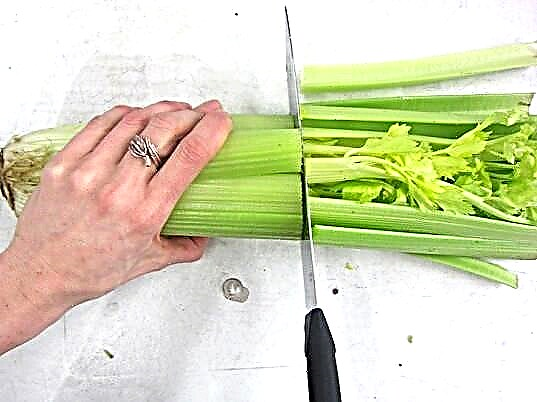
Photo: inhabitat.com
Vegetables will play the role of stamps. They need to be washed, dried and, if necessary, cut - at celery cut leaves, pepper cut in half so that the structure is visible.
2. We prepare paints
Photo: inhabitat.com
In different containers, mix the colors, finding the shades with which you will decorate the bag (or fabric).
3. We paint "vegetable stamps"
Photo: inhabitat.com
Pour the paint onto the substrate and dip the “stamps” of vegetables into it. Dip the part that you will later apply to the fabric.
4. Put a pattern on the fabric

Photo: inhabitat.com
In order to get a colorful pattern, we roll the coated corn on the fabric with paint. We put the points in half carrots. From a corn cob cut in half, a bunch of celery and pepper, flowers will be obtained.
5. We fix the picture
Photo: inhabitat.com
We wait for the paints to dry and fix the picture, ironing it with an iron.
English beach bag
3. Bag, painted according to the template: video workshop
Coloring templates can also be bought or made independently. The easiest way is to print or draw them, transfer the picture to thick paper, cardboard, a thick film and cut along the contour with a breadboard knife.
You will need:
Acrylic paints for fabric of different colors
Ready-made templates or drawing + paper + breadboard knife for their manufacture
Thick brushes
Large piece of cardboard
Masking tape
Iron
Triangle Pillow
4. Bag with application: master class
You can choose any application form. You can use a glue spider web, glue for fabric or sew on applique details on a typewriter.
Photo: vanessachristenson.com
You will need:
Small pieces of fabric in different colors
Glue web
Hexagon pattern
Pencil
Thread
Scissors
Sewing machine
Iron
1. Translate the template
Photo: vanessachristenson.com
Smooth pieces of fabric. Transfer the template to each piece from the wrong side.
2. Sew with a spider web
Photo: vanessachristenson.com
Fold each shred of the same size with a piece of cobweb (the glue side of the cobweb with the front side of the fabric) and sew along the line of the template on the machine, leaving no holes for turning out.
3. Turn out
Photo: vanessachristenson.com
Carefully cut a hole on the cobwebs with scissors and through it we turn out every detail of the application.
4. Glue
Photo: vanessachristenson.com
Choose places for each piece of applique, lay them all out and glue them by ironing. Done!
Options for decorating fabric bags:

Photo: brit.co
Photo: snapmade.com
Photo: thephenomenalmama.blogspot.com
Photo: diaryofamadcrafter.wordpress.com
Photo: vanessachristenson.com
Photo: mamookids.com
Photo: buggyandbuddy.com
Photo: paintandpattern.com
Photo: asksarah.com.au
Photo: paintandpattern.com
Photo: morenascorner.com
Photo: hellowonderful.co
Photo: limeriot.blogspot.co.uk
Photo: YouTube / Trims & Tassels
Photo: craftgawker.com
Photo: honeyberrydiary.com