Share
Pin
Tweet
Send
Share
Send
Several layers of fabric, a couple of lines - and the motive comes to light! Thanks to simple carving, colorful motifs appear on the pillows.
We interpreted the traditional technique of the American Indians in a modern spirit. We have no doubt that this technique is perfect for decorating accessories in any style, as well as clothing, and not only for children.
For the upper side of the pillow you will need: 3 layers of different fabrics for the upper side of the pillow, all size. 45 x 45 cm; motif patterns, pins, sewing threads, scissors, felt-tip pen for copying onto fabric.

Step 1
Lay the three layers of fabric exactly on top of each other and pin them along the edge with pins.

Step 2
Lay out the main motif template in the middle of the top layer. Motive pins around the edges.

Step 3
Transfer the contours of the motif onto the fabric with a felt-tip pen with carbon ink.
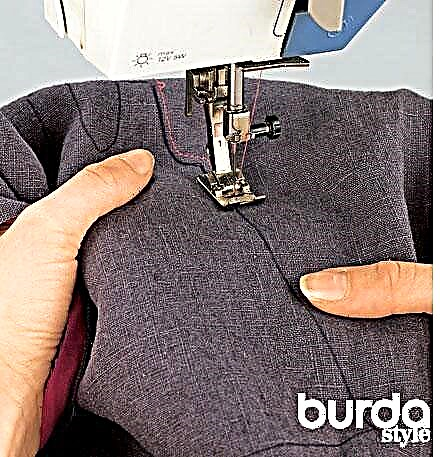
Step 4
Sew along the contoured lines on the machine. The inside of the presser foot of the machine lies exactly on the line - that is, the seam passes behind the motive, at a distance of 0.3 cm from the line. Cut the ends of the threads.

Step 5
Cut the top layer of fabric along the outline of the motif. The seam is, as before, outside the motive and is not damaged when cutting the fabric.

Step 6
Pins the next part of the motive with pins, in our case it's an apron. Then use the felt-tip pen to transfer its contours to the fabric.

Step 7
Sew as described in step 4. The seam runs 0.3 cm from the edge behind the motif.

Step 8
Now cut the next layer of fabric along the contour line of part of the motif (as described in step 5). The top side of the pillow is ready!
Photo: Jan Schmidel, design and manufacture: Alexandra Melachrinos.
Share
Pin
Tweet
Send
Share
Send